
Installation
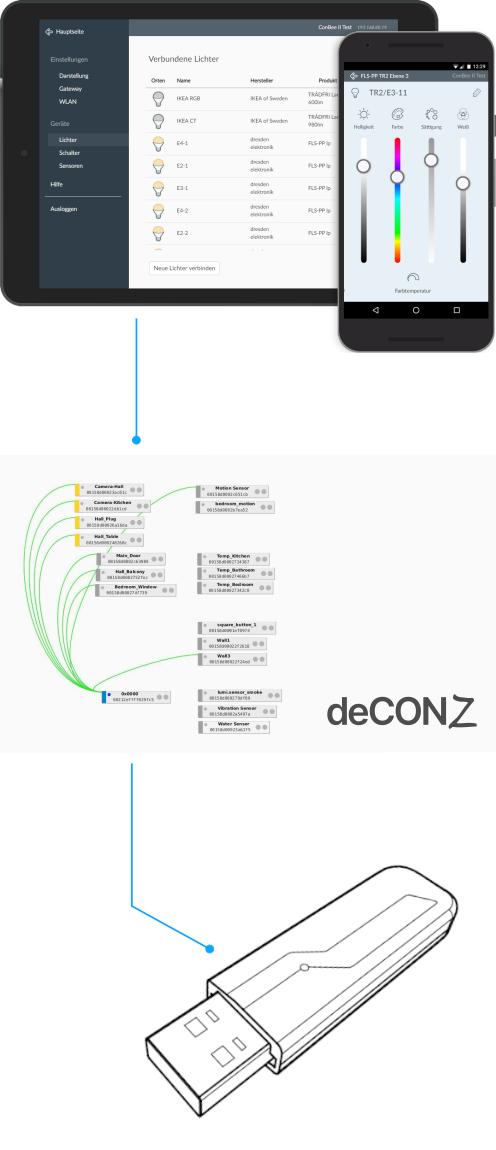
The deCONZ application is a tool to configure, control and monitor Zigbee networks with the ConBee III.
The following sections describe the installation steps of deCONZ for various platforms.
Supported platforms
Connection
To ensure a strong radio signal, the ConBee III should preferably be connected to a USB 2.0 socket with an USB extension cable.
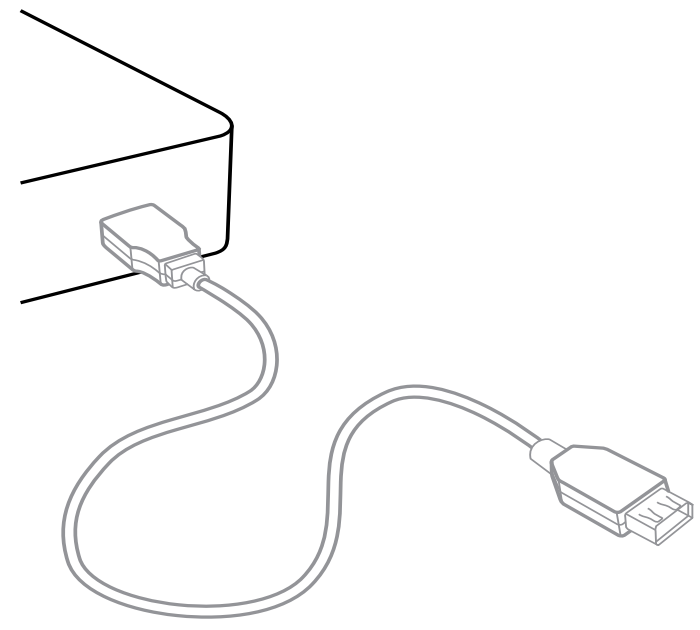
- Prevents interference with housing and peripherals
- Provides maximum signal range and reliability
Note
Connection problems may occur if the ConBee III is attached directly to the USB port or is located near USB 3.0 devices such as external hard drives or memory sticks.
Raspberry Pi OS
Supported Raspberry Pi models and distributions
- Raspberry Pi (all models, except Pico)
- Raspberry Pi OS
Note
The following steps describe the manual installation of deCONZ. Alternatively a preinstalled SD-card image can be used.
Installation
Set user USB access rights
sudo gpasswd -a $USER dialoutNote: Changes to access rights only become active after logging out and in or after a restart.
Import Phoscon public key
wget -qO- https://phoscon.de/apt/deconz.pub.key | gpg --dearmor | \
          sudo tee /etc/apt/trusted.gpg.d/deconz-keyring.gpg >/dev/null
Configure the APT repository for deCONZ
Stable
sudo sh -c "echo 'deb http://phoscon.de/apt/deconz \
            generic main' > \
            /etc/apt/sources.list.d/deconz.list"
Beta (alternative)
sudo sh -c "echo 'deb http://phoscon.de/apt/deconz \
            generic-beta main' > \
            /etc/apt/sources.list.d/deconz.list"
Update APT package list
sudo apt updateInstall deCONZ
sudo apt install deconzCreate UDEV rule
 echo ACTION=='"add"', SUBSYSTEMS=='"usb"', \
      ATTRS{product}=='"ConBee III"', \
      RUN+='"/bin/stty -F /dev/%k 115200"' | \
      sudo tee /etc/udev/rules.d/99-conbee3.rules
Note: The ConBee III gets activated after a restart or unplug / reattach.
After the installation deCONZ can be started via the application menu.
Menu > Programming > deCONZ
Now the first Zigbee devices can be paired via the Phoscon App. Further information can be found in the Phoscon App documentation.
Troubleshooting
If problems occur during the installation, the Support section answers frequently asked questions (FAQ) and provides further assistance.
Ubuntu
Supported Ubuntu versions
- Ubuntu 18.04 LTS 64-Bit PC (AMD64)
- Ubuntu 20.04 LTS 64-Bit PC (AMD64)
Installation
Set user USB access rights
sudo gpasswd -a $USER dialoutNote: Changes to access rights only become active after logging out and in or after a restart.
Import Phoscon public key
wget -qO- https://phoscon.de/apt/deconz.pub.key | gpg --dearmor | \
          sudo tee /etc/apt/trusted.gpg.d/deconz-keyring.gpg >/dev/null
Configure the APT repository for deCONZ
Stable
sudo sh -c "echo 'deb [arch=amd64] http://phoscon.de/apt/deconz \
            generic main' > \
            /etc/apt/sources.list.d/deconz.list"
Beta (alternative)
sudo sh -c "echo 'deb [arch=amd64] http://phoscon.de/apt/deconz \
            generic-beta main' > \
            /etc/apt/sources.list.d/deconz.list"
Update APT package list
sudo apt updateInstall deCONZ
sudo apt install deconzCreate UDEV rule
 echo ACTION=='"add"', SUBSYSTEMS=='"usb"', \
      ATTRS{product}=='"ConBee III"', \
      RUN+='"/bin/stty -F /dev/%k 115200"' | \
      sudo tee /etc/udev/rules.d/99-conbee3.rules
Note: The ConBee III gets activated after a restart or unplug / reattach.
After the installation deCONZ can be started via the application menu.
Now the first Zigbee devices can be paired via the Phoscon App. Further information can be found in the Phoscon App documentation.
Auto start of the deCONZ GUI (optional)
Open the Startup Application Preferences via the application menu
gnome-session-propertiesAdd a new entry with the following commandline:
deCONZ --http-port=80 --auto-connect=1
Troubleshooting
If problems occur during the installation, the Support section answers frequently asked questions (FAQ) and provides further assistance.
Linux Headless
The SD card images as well as the standard installation method start automatically with graphical user interface.
Switch off graphical user interface (headless)
To switch off the graphical user interface (GUI), the following commands must be entered in the console:
Stop the GUI service immediately.
sudo systemctl disable --now deconz-guiStart the headless service now and every time the system starts.
sudo systemctl enable --now deconz
Switch on graphical user interface (GUI)
To switch on the graphical user interface (GUI), the following commands must be entered in the console:
Stop the headless service immediately.
sudo systemctl disable --now deconzStart the GUI service now and every time the system starts.
sudo systemctl enable --now deconz-gui
Home Assistant ZHA
Supported versions
Minimum requirements:
- Home Assistant Core 2023.12.0 (stable version)
- ConBee III firmware version 0x264E0900
Update ConBee III
The ConBee III firmware must be updated manually via the command line as described in the wiki article Update ConBee III firmware manually and Youtube-clip, to ensure a proper function with the ZHA integration. The updae proces behaves exactly like the ConBee II update. The necessary update tool GCFFlasher is available as stand-alone version for download.
Installation
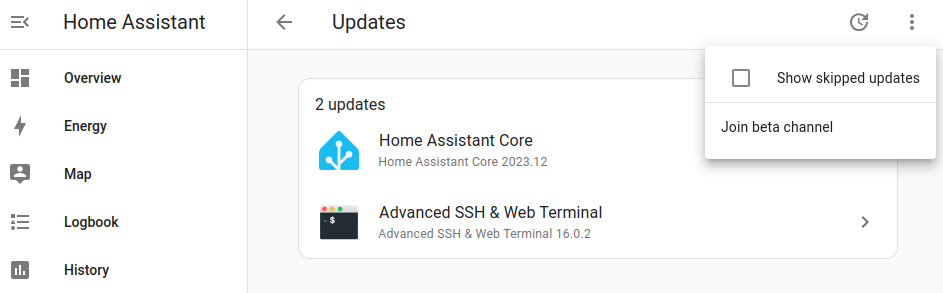
Login into Home Assistant web interface and open the
Settings
section.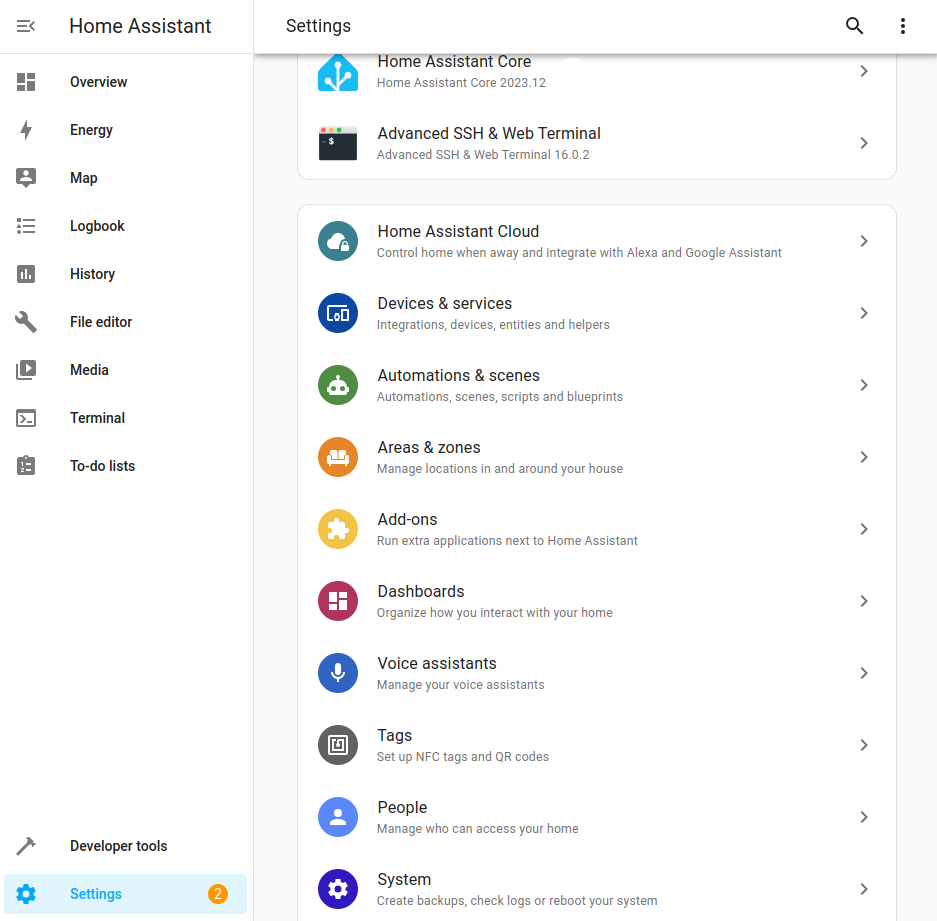
Open the settings of the
System
and switch to theUpdates
section.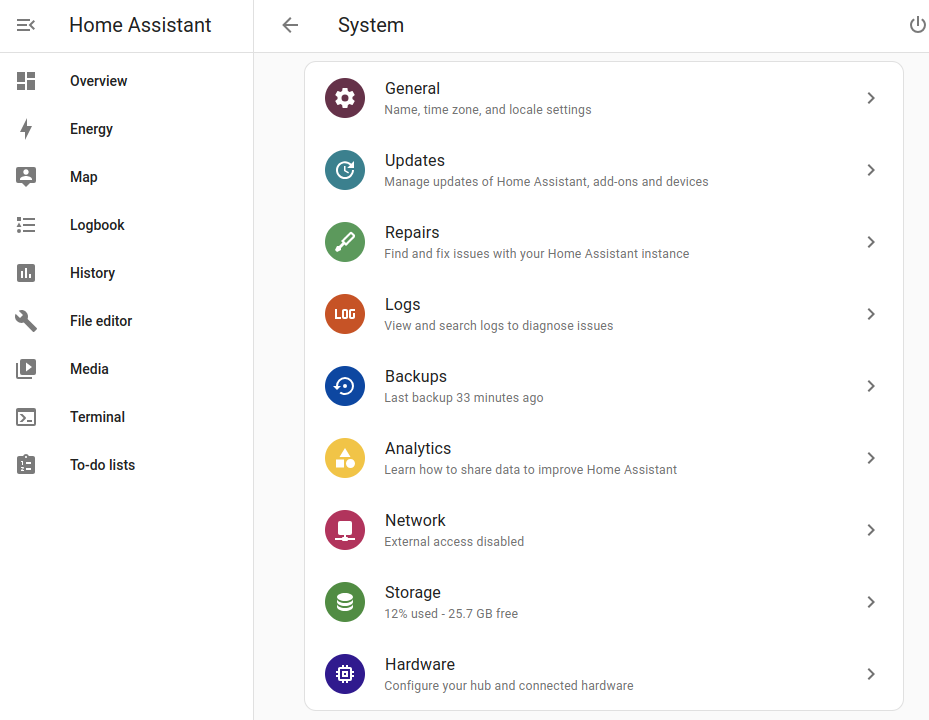
Update the Home Assistant core at least to 2023.12.0.
Open
Devices & Services
in the settings section.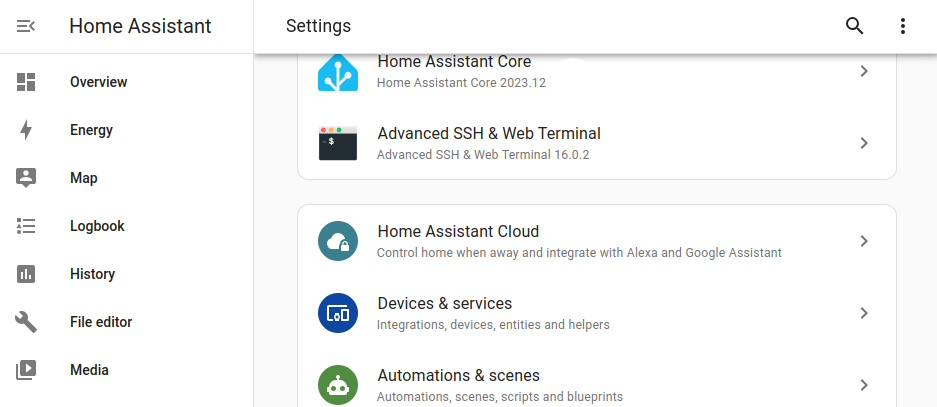
Search and add the ZHA service.
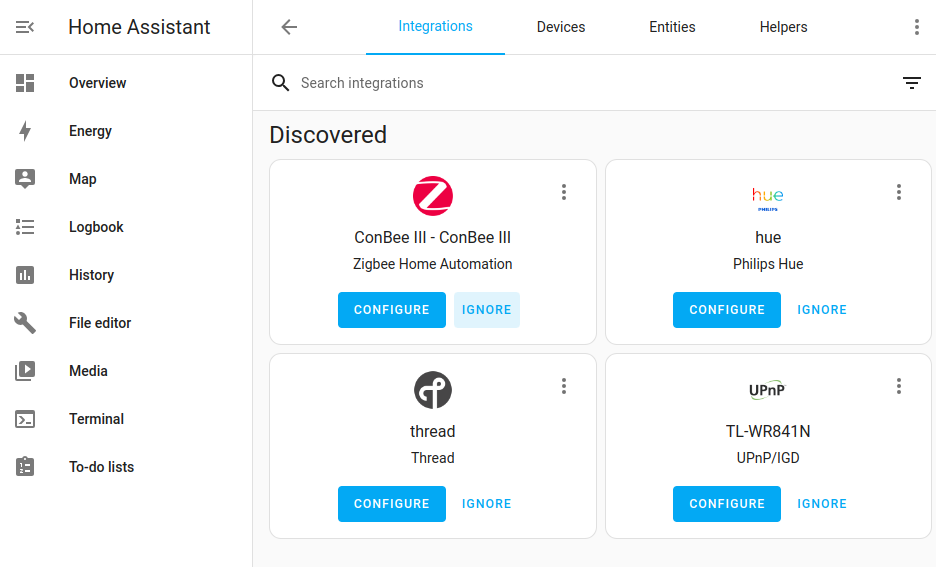
Configure the ZHA integration to set up the ConBee III.
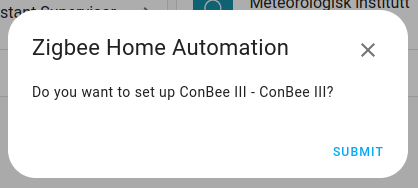
Define the network formation: keep network settings, upload a backup or create a new network.

Docker
Supported host systems
- Linux x86_64/amd64
- Linux armv7 (e.g. Raspberry Pi)
- Linux arm64
To run deCONZ in a Docker container, we recommend the Docker image deconz-community/deconz-docker, which is maintained by the community.
The installation steps are described on https://github.com/deconz-community/deconz-docker.
macOS installation
Download deCONZ.
Unzip and start deCONZ.
Unzip the file
deCONZ_macOS.zip
inDownloads
and start the applicationdeCONZ.app
.
Windows 11 installation
Install USB driver.
The drivers are installed automatically after connecting the ConBee III. If necessary, the drivers are downloaded from the Internet. Alternatively, the necessary drivers can be downloaded from the official manufacturer website https://ftdichip.com.
Download deCONZ software.
Start deCONZ installation.
Select and execute deCONZ Setup .exe-file in
Downloads
.Confirm installation of unknown app.
Select
More information
.Start deCONZ installation with
Run anyway
.
Follow the instructions in deCONZ setup.
Start deCONZ in Search input.
Windows 10 installation
Install USB driver.
The drivers are installed automatically after connecting the ConBee III. If necessary, the drivers are downloaded from the Internet. Alternatively, the necessary drivers can be downloaded from the official manufacturer website https://ftdichip.com.
Download deCONZ software.
Start deCONZ installation.
Select and execute deCONZ Setup .exe-file in
Downloads
.Confirm installation of unknown app.
Select
More information
.Start deCONZ installation with
Run anyway
.
Follow the instructions in deCONZ setup.
Start deCONZ in Search input.
Firmware Update
Update directly in the web browser
The ConBee III firmware can be updated in the web browser. Currently, only Chrome and Edge are supported.
Open the Online Firmware Updater
Connect the ConBee III to your PC/laptop
Perform the update
Done!
Update manually
The firmware of the ConBee III can be updated manually. An tutorial video for the update under Windows is available on Youtube:
Furthermore, the individual steps, also for other operating systems, are described in the FAQ.
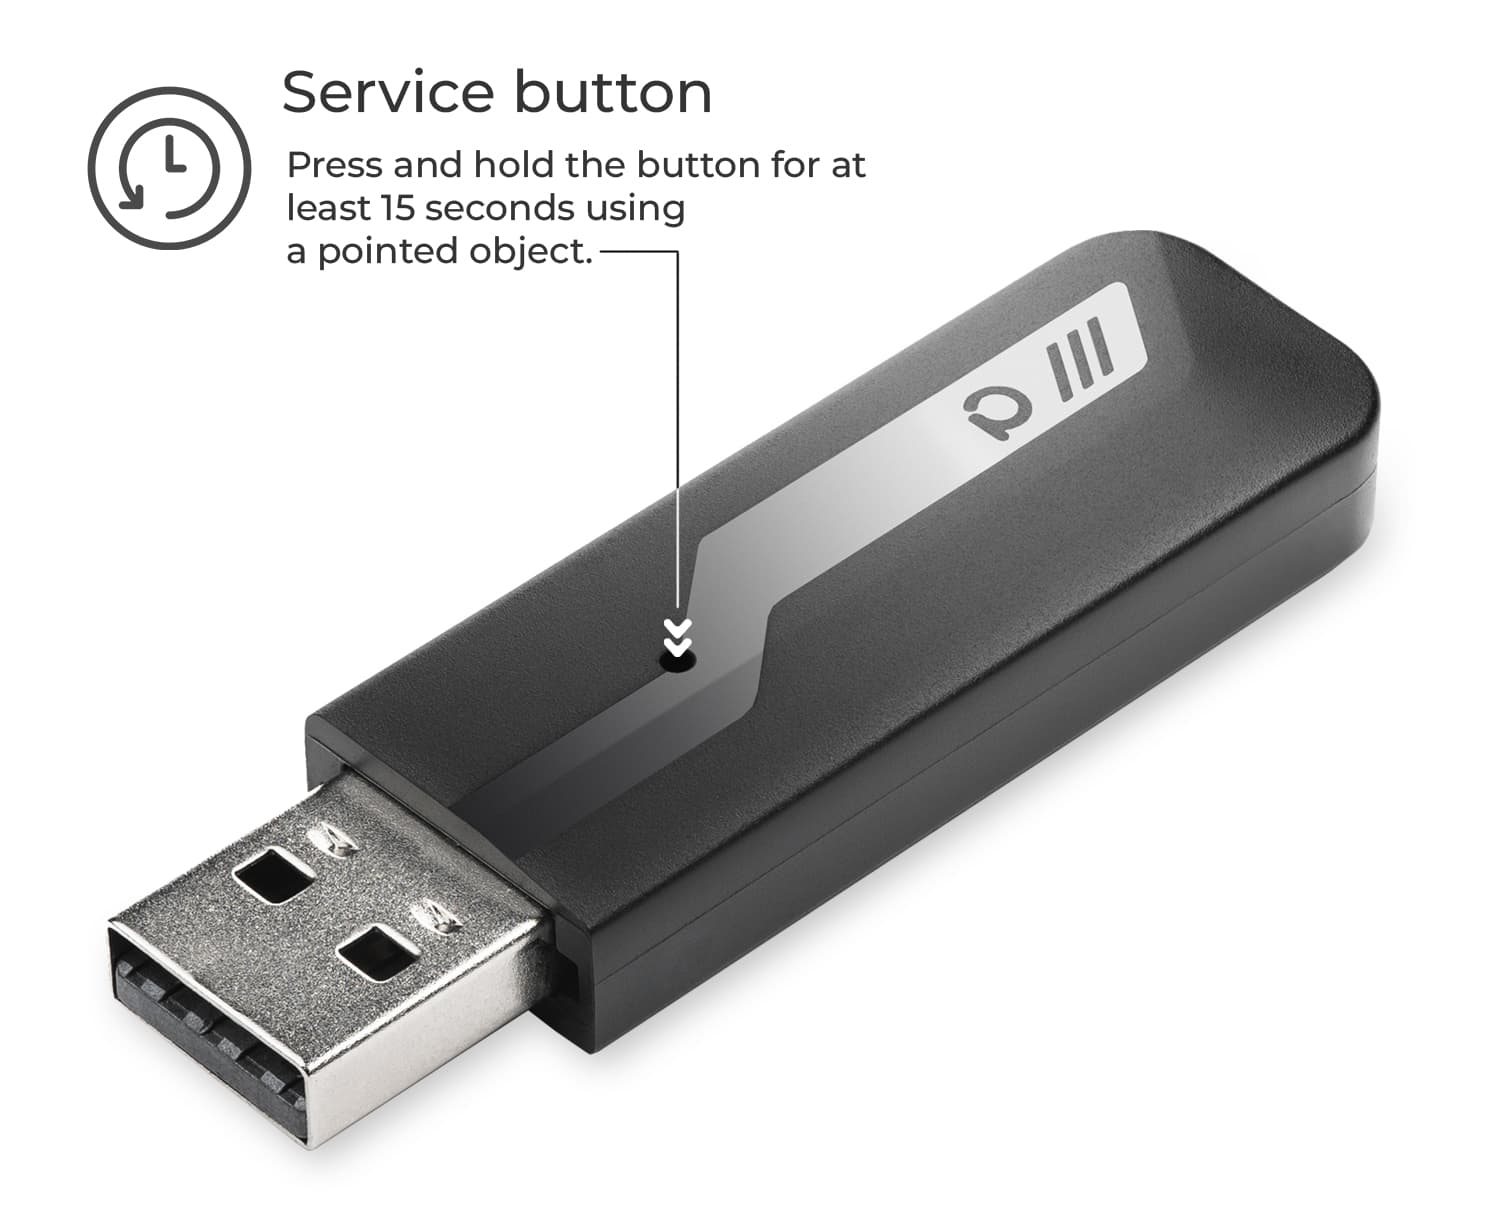
Factory reset
The ConBee III could be reset to factory new settings by using the integrated service button.
- Press and hold the button for at least 15 seconds using a pointed object.
- The ConBee III must be plugged into an active USB port. (PC, laptop, mini PC, USB charger)
- This process requires no software like deCONZ or Phoscon App to be active.
The following parameters are reset to factory new settings:
- Restore original MAC address
- Set a random network name (PANID)
- Set radio channel 11
- Set a random network key