
Installation
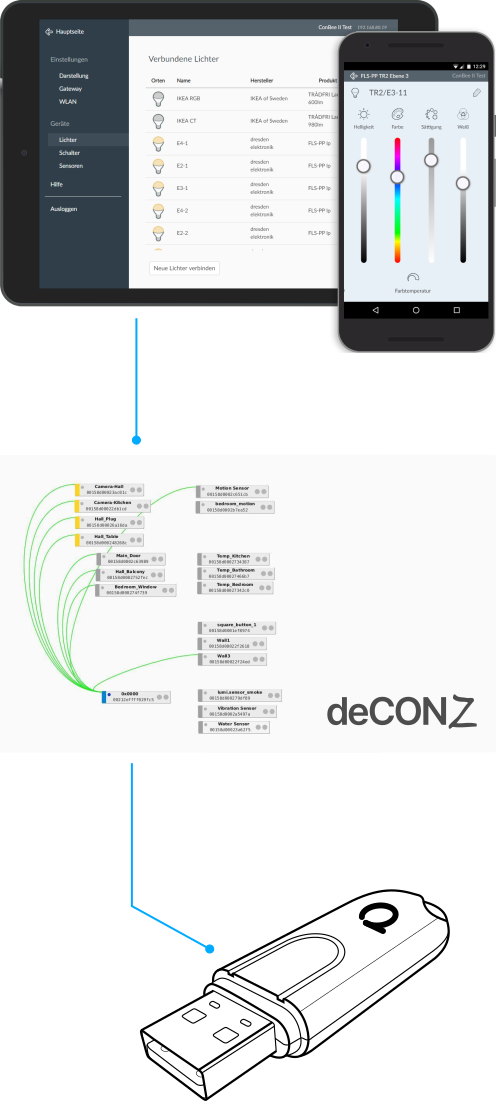
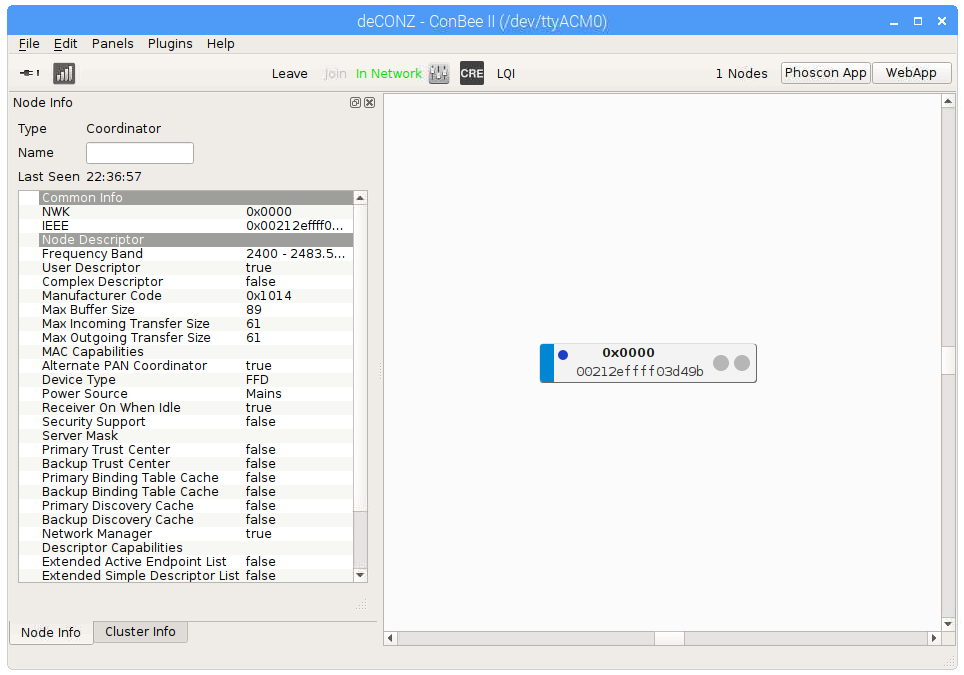
The deCONZ application is a tool to configure, control and monitor Zigbee networks with the ConBee II.
The following sections describe the installation steps of deCONZ for various platforms.
Supported platforms
Connection
To ensure a strong radio signal, the ConBee II should preferably be connected to a USB 2.0 socket with an USB extension cable.

- Prevents interference with housing and peripherals
- Provides maximum signal range and reliability
Note
Connection problems may occur if the ConBee II is attached directly to the USB port or is located near USB 3.0 devices such as external hard drives or memory sticks.
Raspberry Pi OS
Supported Raspberry Pi models and distributions
- Raspberry Pi (all models, except Pico)
- Raspberry Pi OS
Note
The following steps describe the manual installation of deCONZ. Alternatively a preinstalled SD-card image can be used.
Installing the Operating System
Download and launch Raspberry Pi Imager from the website www.raspberrypi.com/software

Insert the SD card into your PC or an SD card reader.
Raspberry Pi Device: Select your Raspberry Pi model.
Operating System: Select a current operating system.
Storage: Select the SD card drive.
Use OS Customisation: Click
No
if the default settings are acceptable, for example, if you are using an Ethernet cable and have direct access via a connected mouse, keyboard, and monitor. Otherwise, clickYes
to adjust the settings: hostname, username, password, Wi-Fi, time zone, and keyboard layout, and save them withsave
.

To access the Raspberry Pi remotely, i.e., without a connected mouse, keyboard, and monitor, it is important to enable the SSH interface under the
Services
menu. Furthermore, you should assign your own login credentials under Set username and password.Write: Start the copying process
Remove the SD card from the card slot (eject it in Windows Explorer → right-click on the drive letter and select
Eject
)Insert the microSD card into the Raspberry Pi’s SD card slot
Connect the USB cable to the Raspberry Pi. The operating system will start automatically after approximately three seconds and will be ready for use after approximately one minute.
Remote Access
Remote access to the Raspbian OS desktop is via the VNC interface. This must first be enabled after successful operating system installation.
To do this, log in to the Raspberry Pi using a suitable SSH console program via its IP address, with the previously assigned Username and Password, and enter the following command:
sudo raspi-configIn the menu item
3. Interface Options,
set theI3 VNC
option to Enable.Restart the Raspberry Pi
sudo reboot
You can now access the Raspbian OS desktop using a suitable VNC program.
deCONZ Installation
Set user USB access rights
sudo gpasswd -a $USER dialoutNote: Changes to access rights only become active after logging out and in or after a restart.
Import Phoscon public key
wget -qO- https://phoscon.de/apt/deconz.pub.key | gpg --dearmor | \
          sudo tee /etc/apt/trusted.gpg.d/deconz-keyring.gpg >/dev/null
Configure the APT repository for deCONZ
Stable
sudo sh -c "echo 'deb http://phoscon.de/apt/deconz \
            generic main' > \
            /etc/apt/sources.list.d/deconz.list"
Beta (alternative)
sudo sh -c "echo 'deb http://phoscon.de/apt/deconz \
            generic-beta main' > \
            /etc/apt/sources.list.d/deconz.list"
Update APT package list
sudo apt updateInstall deCONZ
When using an older distribution (before Debian Bookworm)
sudo apt install deconzWhen using a current distribution with Qt6 (from Debian Bookworm onwards)
sudo apt install deconz-qt6
After the installation deCONZ can be started via the application menu.
Menu > Programming > deCONZ
Now the first Zigbee devices can be paired via the Phoscon App. Further information can be found in the Phoscon App documentation.
Auto start of the deCONZ GUI (optional)
Start the GUI service every time the system starts.
sudo systemctl enable deconz-guiTroubleshooting
If problems occur during the installation, the Support section answers frequently asked questions (FAQ) and provides further assistance.
Zigbee2MQTT
The installation instructions show how to start up Zigbee2MQTT with the ConBee II on a Raspberry Pi 5 with Raspberry Pi OS (Debian Trixie) installed.
Requirement
- Raspberry Pi 5
- Raspberry Pi OS → Installing the operating system see here
Installation with onboarding (web browser wizard)
This guide is based on the official description of Zigbee2MQTT on Linux.
Installation of MQTT Broker: Instructions
Installation of the necessary environment and Zigbee2MQTT: Instructions
Connect ConBee II to Raspberry Pi
Open the console and run the first start of Zigbee2MQTT
cd /opt/zigbee2mqtt
pnpm start
Open the web browser on the Raspberry Pi and start the Zigbee2MQTT onboarding via the address http://localhost:8080
or
Start Zigbee2MQTT onboarding via the Raspberry Pi using an external web browser from a PC or laptop:
Method 1: http://raspberrypi:8080
Method 2: [Raspberry_Pi_Hostname]:8080
Method 3: [Raspberry_Pi_IP_Address]:8080Select the
ConBee II
and check that the baud rate115200
and the adapterdeconz
are set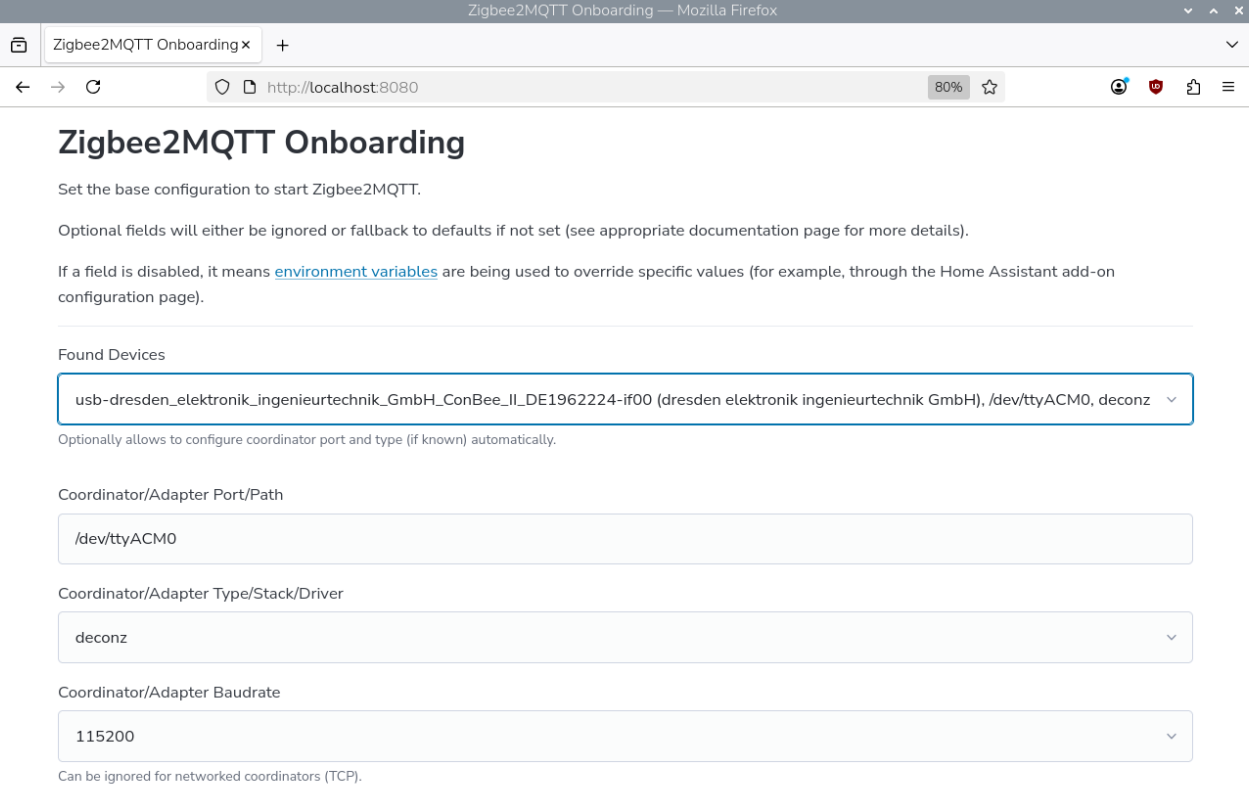
Activate Zigbee2MQTT frontend and click
Submit
.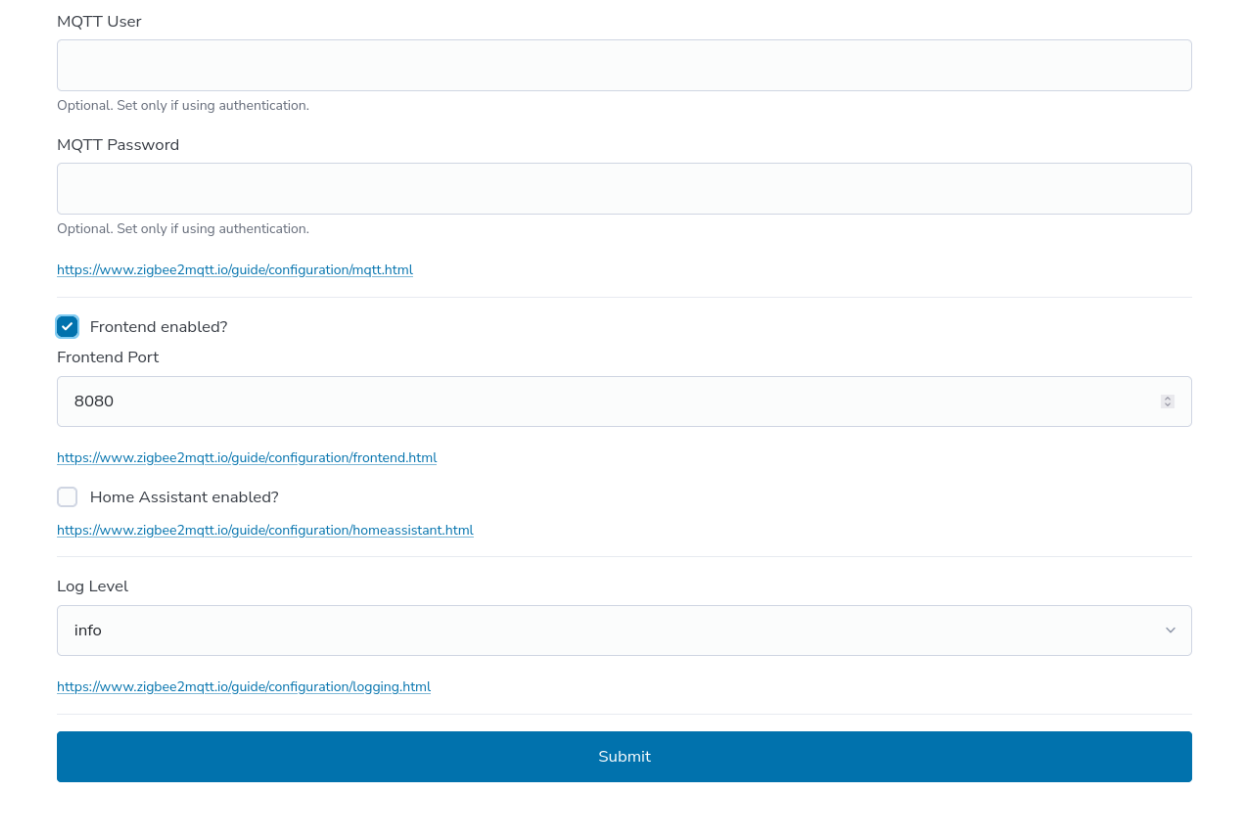
After about 30 seconds the Zigbee2MQTT frontend will be loaded
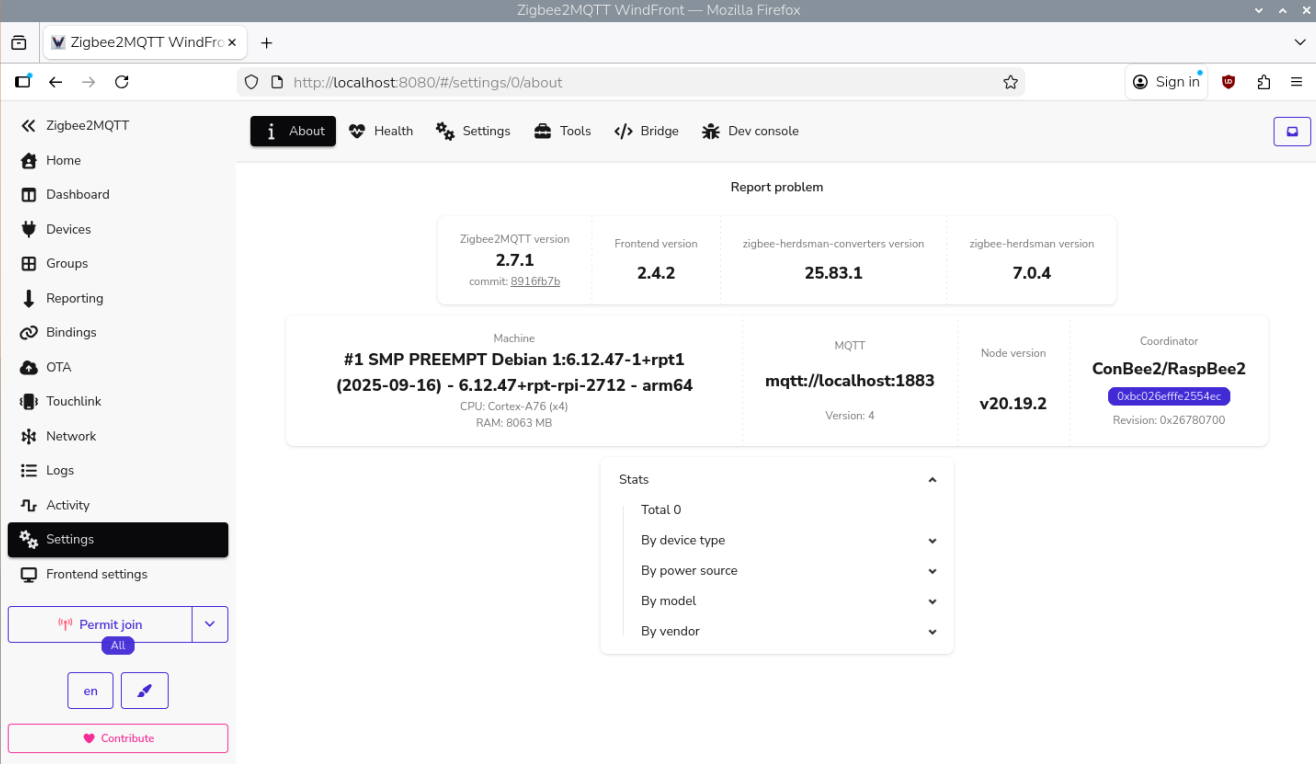
The first Zigbee devices can now be trained via the web frontend.
Installation via console
This guide is based on the official description of Zigbee2MQTT on Linux.
Installation of MQTT Broker: Instructions
Installation of the necessary environment and Zigbee2MQTT: Instructions
Connect ConBee II to Raspberry Pi and start the console
Determine the connection port
ls -l /dev/serial/by-id
Note
We recommend using the specific name of the ConBee II as the port instead of just entering the interface ttyACM0. As soon as this interface changes, e.g. when using a different USB interface, Zigbee2MQTT will no longer work.
Open directory for configuring Zigbee2MQTT
cd /opt/zigbee2mqtt/data/Create configuration file
configuration.yaml
nano configuration.yamlEnter the previously determined connection port, the baud rate
115200
and the adapterdeconz
and save the configuration fileExample with generic interface name ttyACM0:
mqtt:
     base_topic: zigbee2mqtt
     server: mqtt://localhost:1883
serial:
     port: /dev/serial/ttyACM0
     baudrate: 115200
     adapter: deconz
advanced:
     log_level: info
     network_key: GENERATE
     pan_id: GENERATE
     ext_pan_id: GENERATE
frontend:
     enabled: true
     port: 8080
homeassistant:
     enabled: false
onboarding: false
Example with defined ConBee II device name:

Start the Zigbee2MQTT application. If configured correctly, no error messages should appear.
pnpm start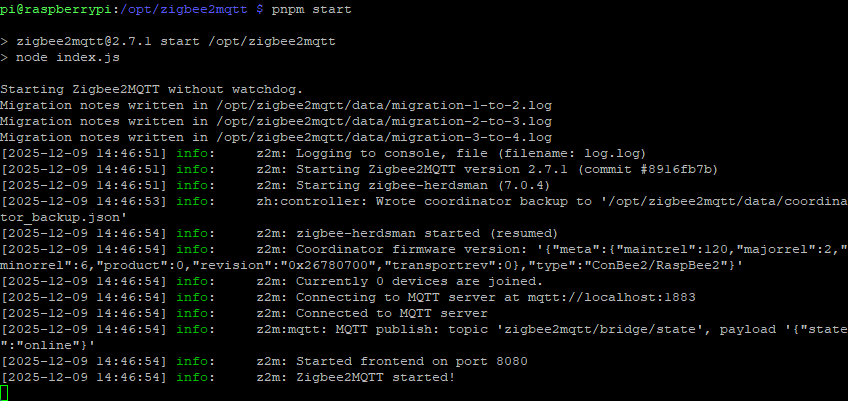
Open the web browser on the Raspberry Pi and start the Zigbee2MQTT frontend via the address http://localhost:8080
or
Start the Zigbee2MQTT frontend with an external web browser from a PC or laptop via the Raspberry Pi:
Method 1: http://raspberrypi:8080
Method 2: [Raspberry_Pi_Hostname]:8080
Method 3: [Raspberry_Pi_IP_Address]:8080
The first Zigbee devices can now be trained via the web frontend.
Ubuntu
Supported Ubuntu versions
- Ubuntu 18.04 LTS 64-Bit PC (AMD64)
- Ubuntu 20.04 LTS 64-Bit PC (AMD64)
Installation
Set user USB access rights
sudo gpasswd -a $USER dialoutNote: Changes to access rights only become active after logging out and in or after a restart.
Import Phoscon public key
wget -qO- https://phoscon.de/apt/deconz.pub.key | gpg --dearmor | \
          sudo tee /etc/apt/trusted.gpg.d/deconz-keyring.gpg >/dev/null
Configure the APT repository for deCONZ
Stable
sudo sh -c "echo 'deb [arch=amd64] http://phoscon.de/apt/deconz \
            generic main' > \
            /etc/apt/sources.list.d/deconz.list"
Beta (alternative)
sudo sh -c "echo 'deb [arch=amd64] http://phoscon.de/apt/deconz \
            generic-beta main' > \
            /etc/apt/sources.list.d/deconz.list"
Update APT package list
sudo apt updateInstall deCONZ
When using an older distribution (before Ubuntu 24.04)
sudo apt install deconzWhen using a current distribution with Qt6 (from Ubuntu 24.04 onwards)
sudo apt install deconz-qt6
After the installation deCONZ can be started via the application
menu. 
Now the first Zigbee devices can be paired via the Phoscon App. Further information can be found in the Phoscon App documentation.
Auto start of the deCONZ GUI (optional)
Open the Startup Application Preferences via the application menu
gnome-session-propertiesAdd a new entry with the following commandline:
deCONZ --http-port=80 --auto-connect=1
Troubleshooting
If problems occur during the installation, the Support section answers frequently asked questions (FAQ) and provides further assistance.
Linux Headless
The SD card images as well as the standard installation method start automatically with graphical user interface.
Switch off graphical user interface (headless)
To switch off the graphical user interface (GUI), the following commands must be entered in the console:
Stop the GUI service immediately.
sudo systemctl disable --now deconz-guiStart the headless service now and every time the system starts.
sudo systemctl enable --now deconz
Switch on graphical user interface (GUI)
To switch on the graphical user interface (GUI), the following commands must be entered in the console:
Stop the headless service immediately.
sudo systemctl disable --now deconzStart the GUI service now and every time the system starts.
sudo systemctl enable --now deconz-gui
Docker
Supported host systems
- Linux x86_64/amd64
- Linux armv7 (e.g. Raspberry Pi)
- Linux arm64
To run deCONZ in a Docker container, we recommend the Docker image deconz-community/deconz-docker, which is maintained by the community.
The installation steps are described on https://github.com/deconz-community/deconz-docker.
macOS installation
Download deCONZ.
Unzip and start deCONZ.
Unzip the file
deCONZ_macOS.zip
inDownloads
and start the applicationdeCONZ.app
.
Windows 11 installation
Download deCONZ software
Install USB driver
The drivers are installed automatically after connecting the ConBee II. If necessary, the drivers are downloaded from the Internet.
Windows 10 installation
Download deCONZ software
Install USB driver
The drivers are installed automatically after connecting the ConBee II. If necessary, the drivers are downloaded from the Internet.
Windows 7 installation
Download deCONZ software
Download and extract the driver ZIP file
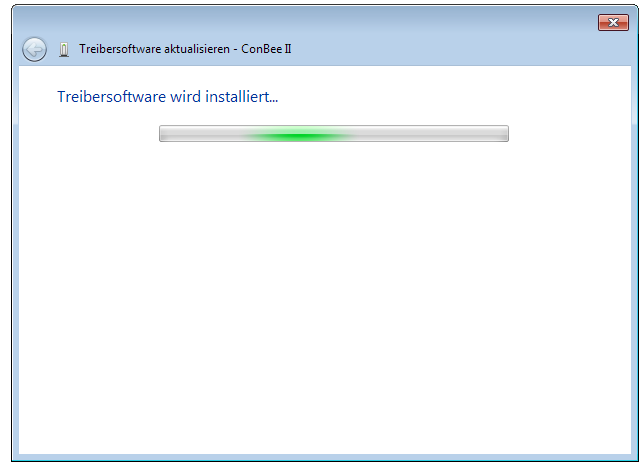
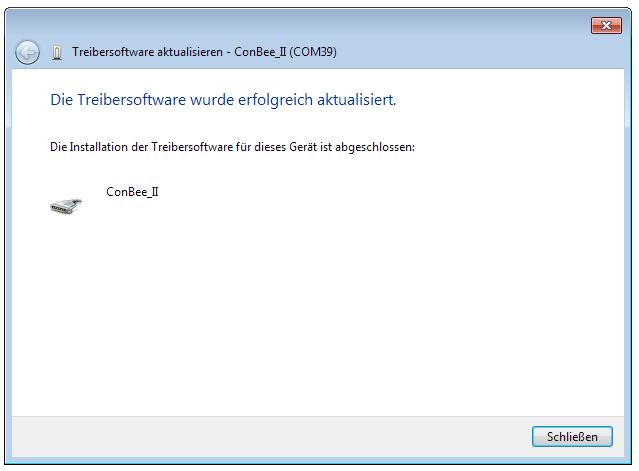
Manual driver installation
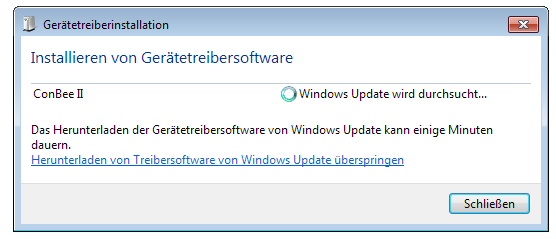
After plugging in the ConBee II, Windows automatically starts the search for a suitable driver.
Select
Skip Windows Update driver software download
.
Open Device Manager
Enter the key combination
<Win> + <Pause>and selectDevice Manager
in the dialog that appears.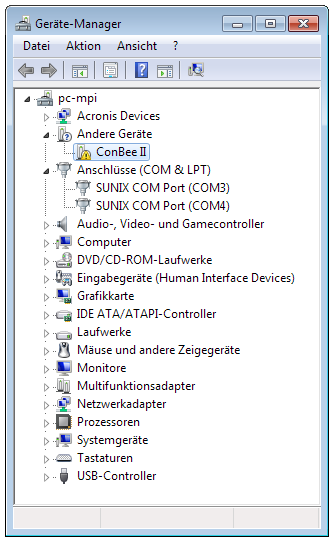
Right click on
ConBee II
and selectUpdate driver
in the context menu.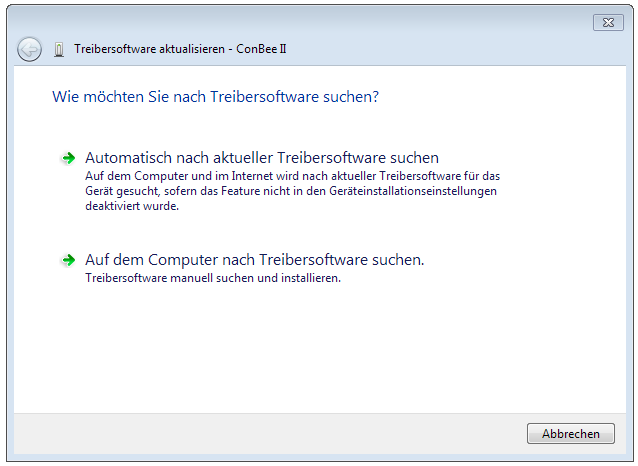
Select the option
Search for driver software on the computer
.
Select the directory with the extracted drivers and follow the instructions.

Firmware Update
The firmware of the ConBee II can be updated manually. An tutorial video for the update under Windows is available on Youtube:
Furthermore, the individual steps, also for other operating systems, are described in the FAQ.